Linux安装Nginx1-基于yum安装
- 工作小总结
- 时间:2022-11-18 19:31
- 4625人已阅读
简介
linux的四种安装方式yum 安装:简单方便,不易出错rpm安装包安装:便捷,方便源码包安装:有点繁琐,服务性能好docker 安装:方便快捷安装步骤安装之前查看端口,默认nginx使用的80端口,如果80端口已经占用启动过程中可能会报错,针对端口占用情况,可以停止占用端口的服务或者nginx改用其他端口启动,停用和改端口方法不再本文介绍netstat -nltp&
🔔🔔好消息!好消息!🔔🔔
有需要的朋友👉:微信号
linux 的四种安装方式
yum 安装:简单方便,不易出错
rpm安装包安装:便捷,方便
源码包安装:有点繁琐,服务性能好
docker 安装:方便快捷
安装步骤
安装之前查看端口,默认nginx使用的80端口,如果80端口已经占用启动过程中可能会报错,针对端口占用情况,可以停止占用端口的服务或者nginx改用其他端口启动,停用和改端口方法不再本文介绍
netstat -nltp | grep 80

如果被其他服务占用的,请先卸载其他应用。
本文,凯哥先介绍使用yum 安装ningx
步骤:
nginx添加yum repro库中
 # 下载nginx包
 wget https://nginx.org/packages/centos/7/noarch/RPMS/nginx-release-centos-7-0.el7.ngx.noarch.rpm

 # 建立nginx的yum仓库
 rpm -ivh nginx-release-centos-7-0.el7.ngx.noarch.rpm

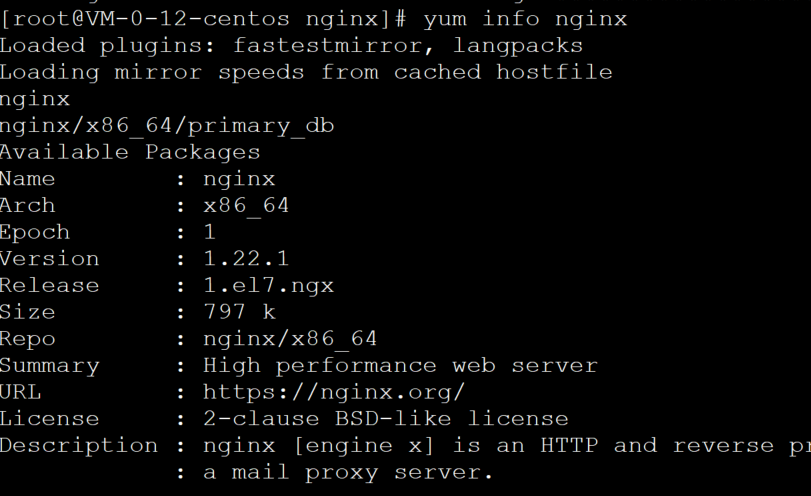
查看nginx信息
yum info nginx

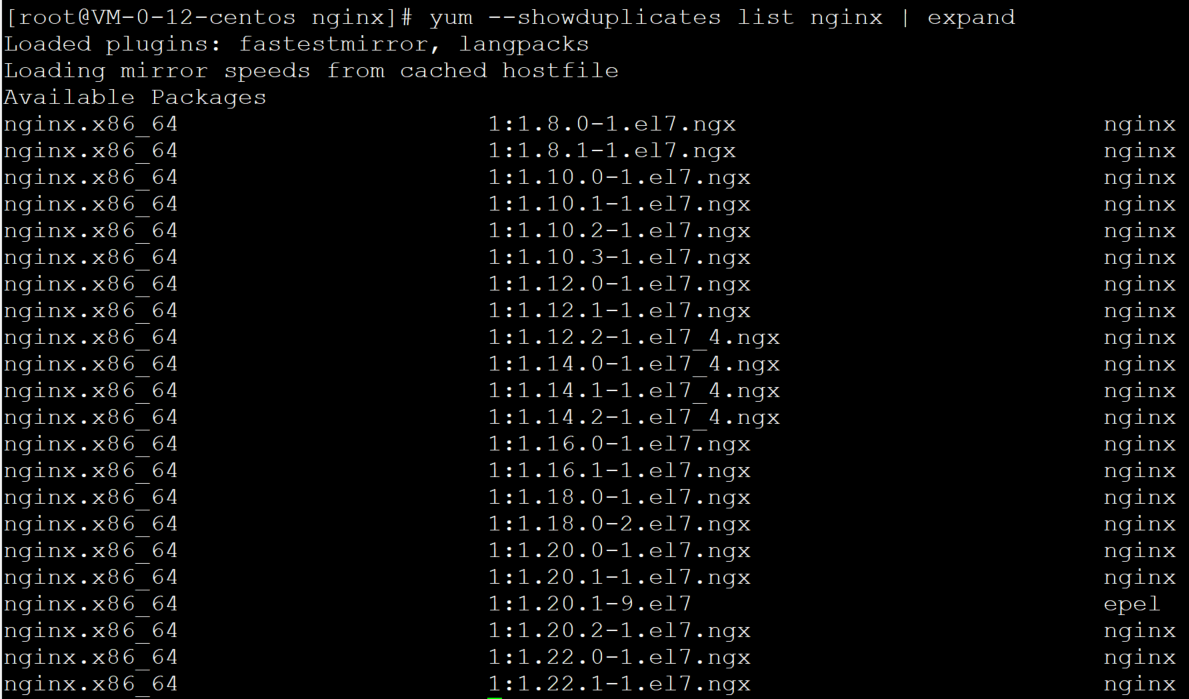
查看yum源仓库中nginx版本
yum --showduplicates list nginx | expand

这里咱们就不用默认的。凯哥指定版本号来安装
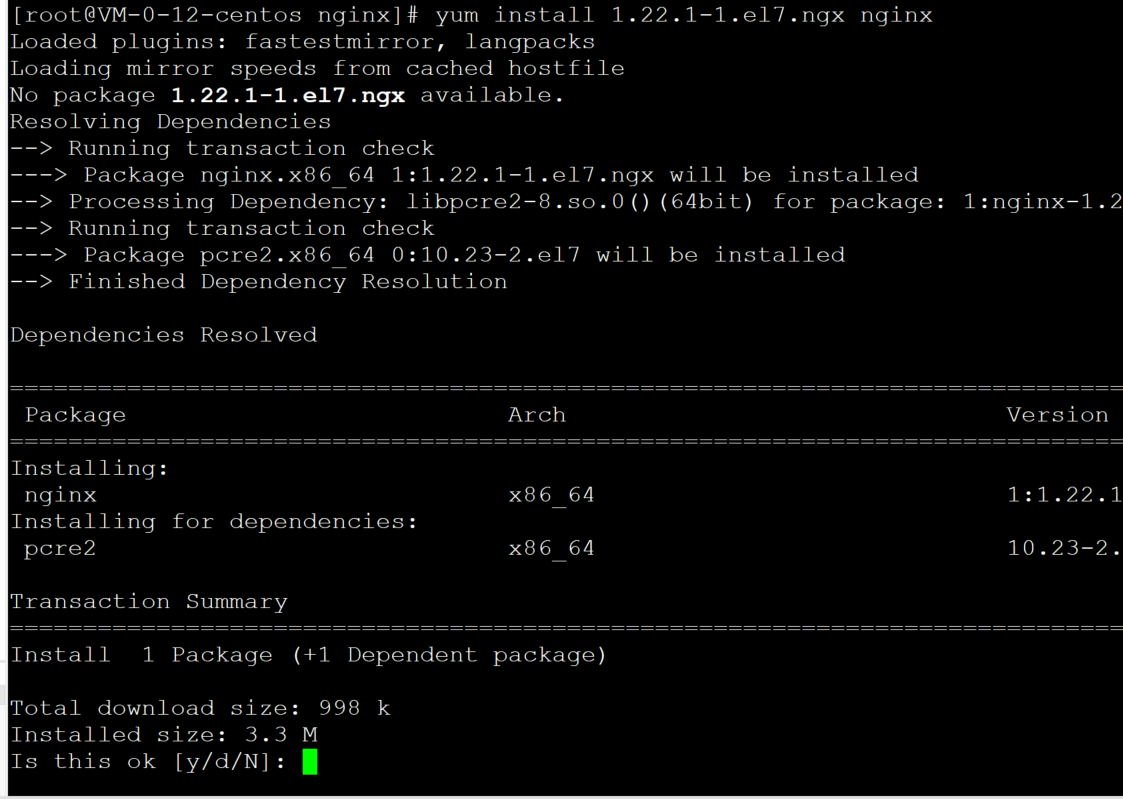
比如咱们安装:1.22.1-1.el7.ngx这个版本。使用下面 命令:
yum install 1.22.1-1.el7.ngx nginx

输入Y

等待,

当看到Complete就安装完成了。
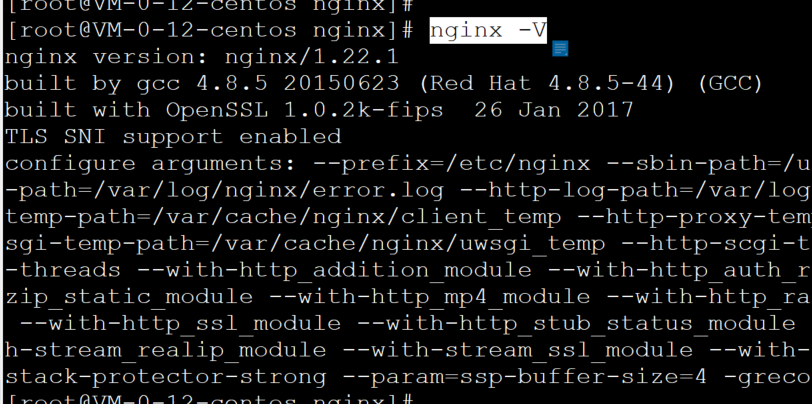
查看版本号:
nginx -V

看一看到配置信息:
--prefix=/etc/nginx --sbin-path=/usr/sbin/nginx --modules-path=/usr/lib64/nginx/modules --conf-path=/etc/nginx/nginx.conf --error-log-path=/var/log/nginx/error.log --http-log-path=/var/log/nginx/access.log --pid-path=/var/run/nginx.pid --lock-path=/var/run/nginx.lock --http-client-body-temp-path=/var/cache/nginx/client_temp --http-proxy-temp-path=/var/cache/nginx/proxy_temp --http-fastcgi-temp-path=/var/cache/nginx/fastcgi_temp --http-uwsgi-temp-path=/var/cache/nginx/uwsgi_temp --http-scgi-temp-path=/var/cache/nginx/scgi_temp --user=nginx --group=nginx --with-compat --with-file-aio --with-threads --with-http_addition_module --with-http_auth_request_module --with-http_dav_module --with-http_flv_module --with-http_gunzip_module --with-http_gzip_static_module --with-http_mp4_module --with-http_random_index_module --with-http_realip_module --with-http_secure_link_module --with-http_slice_module --with-http_ssl_module --with-http_stub_status_module --with-http_sub_module --with-http_v2_module --with-mail --with-mail_ssl_module --with-stream --with-stream_realip_module --with-stream_ssl_module --with-stream_ssl_preread_module --with-cc-opt='-O2 -g -pipe -Wall -Wp,-D_FORTIFY_SOURCE=2 -fexceptions -fstack-protector-strong --param=ssp-buffer-size=4 -grecord-gcc-switches -m64 -mtune=generic -fPIC' --with-ld-opt='-Wl,-z,relro -Wl,-z,now -pie
查看服务状态:
systemctl status nginx

查看80端口:

启动Nginx:
systemctl start nginx
再次查看80端口:

通过IP直接访问:

OK Nginx安装完成